As an Affiliate, We may earn a commission that doesn't cost you extra from qualifying purchases using links in this post. It helps keeps this blog running.
We both know that driftwood can be a captivating addition to your fish tank and aquariums. The mesmerizing textures and earthy charm of driftwood can transform your tank into a captivating underwater landscape that mimics nature’s beauty.
However, before you rush to place that beautifully weathered driftwood piece into your aquarium, there’s an essential step you must undertake to ensure the safety and well-being of your aquarium fish – soaking the driftwood. It’s essential to understand the purpose of soaking driftwood and how to do it correctly.
In this short guide, I’ll take you on a journey to show you the ropes on how to properly soak driftwood for aquariums. It doesn’t really matter if you’re a seasoned pet fish owner or just starting, understanding the intricacies of driftwood preparation is crucial for maintaining a healthy and aesthetically pleasing aquatic environment.
So, stay till the end as I unravel the reasons behind soaking driftwood and the easy steps that some may call secrets to achieve that picture-perfect aquascape while keeping the fish in your fish tank happy and healthy.
Why Soak Driftwood for Aquariums?
Before you toss that piece of driftwood into your fish tank, there’s something crucial you need to know and that is the fact that soaking it is absolutely essential.
Now, you might be wondering, “Why bother soaking driftwood? What’s the big deal?” Well, we’re about to dive into the deep waters of why soaking driftwood is a game-changer for your fish tank ecosystem.
- Removal of Tannins: First things first, let’s talk about tannins. Driftwood naturally contains tannins, which can turn your aquarium water into a murky, tea-like colored mess and lower its pH level. Not exactly the picturesque scene you were going for, right? Well, soaking helps to leach out these tannins, preventing water discoloration and maintaining stable water parameters.
- Buoyancy Adjustment: Have you ever tried to sink a piece of wood in water? It’s not as easy as you might think! Untreated and unsterilized driftwood can be buoyant, causing it to float around in your tank. Soaking it helps the wood become waterlogged, ensuring it stays in place at the bottom of the tank, creating a stable environment for your pet fish.
- Say No to Unwanted Hitchhikers: Nature can be a bit sneaky sometimes. Driftwood can harbor all sorts of critters and unwanted microorganisms. By soaking it, you give these freeloaders the boot and prevent potential harm to your aquatic buddies.
- Preventing Decay: Soaking also helps to remove any potential contaminants, parasites, or fungi from the wood. This pre-soaking process can reduce the risk of introducing harmful elements into your aquarium ecosystem.
- It’s All About pH Balance: Your fish have specific pH preferences. Driftwood can have a slight influence on the acidity of your tank water. Soaking contributes to stabilizing the pH, ensuring your fish thrive in their ideal environment.
- Safety First: Safety always comes first when it comes to your fish tank. Soaking and properly preparing driftwood can help eliminate any toxins that might be lurking in the wood. It’s like a safety net for your fish!
How to Soak Driftwood for Your Aquarium Fish Tank (8 Steps):
Now that we understand why soaking is crucial let’s dive into the steps on how to do it properly:
Step 1: Select Suitable Driftwood
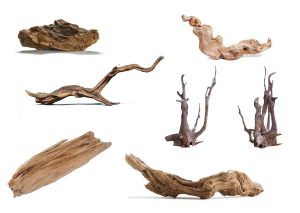
Choose driftwood that goes with your fish and is free from any visible signs of decay or pests. Driftwood pieces with interesting shapes and textures can enhance the visual appeal of your tank.
Step 2: Rinse Thoroughly
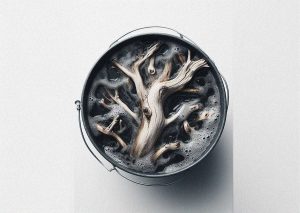
Start by rinsing the driftwood under running tap water to remove any loose dirt or debris. Scrubbing with a soft brush can help clean hard-to-reach areas.
Step 3: Choose a Soaking Container
Select a plastic container large enough to accommodate the driftwood piece. Avoid using metal containers or those that may react with water.
Step 4: Soak in Freshwater

Fill your chosen container with dechlorinated freshwater. This will help prevent chlorine from harming your aquarium’s beneficial bacteria.
Step 5: Submerge and Weigh Down
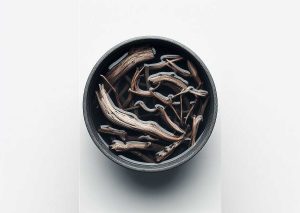
Submerge the driftwood piece in the container, ensuring it is fully covered by water. To prevent floating, you can use rocks or other heavy object to weigh it down.
Step 6: Change Water Regularly
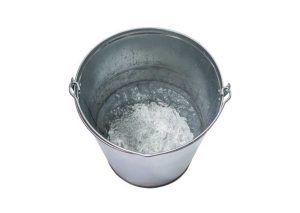
Change the soaking water every few days or when you notice it becoming discolored. This process can take anywhere from a few days to several weeks, depending on the size and type of driftwood.
Step 7: Test Buoyancy
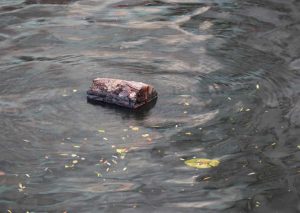
Once the driftwood no longer floats and the water remains clear, it’s ready for your aquarium.
Step 8: Place in Your Aquarium
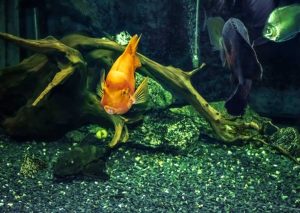
Carefully transfer the soaked driftwood into your aquarium, positioning it as desired. Monitor your water parameters closely over the next few days to ensure stability.
8 Factors to Consider While Soaking Driftwood For Fish Tank Aquarium
Before you start soaking your driftwood, there are a few key factors you should consider to ensure you get the best results. Factors such as:
1. Type of Driftwood:
First things first, not all driftwood is created equal. You’ll want to identify the type of driftwood you have. Is it softwood or hardwood? Softwood driftwood, like pine, tends to soak more quickly than hardwood varieties such as oak. Knowing the wood type will help you plan your soaking time accordingly.
2. Size Matters:
The size of your driftwood piece matters when it comes to soaking. Smaller pieces will naturally take less time to soak compared to larger ones. If you’re working with a substantial chunk of driftwood, be prepared for a longer soaking process.
3. Water Source:
The quality of the water you use for soaking is also crucial. It’s best to use freshwater, like tap water or well water, instead of saltwater or water from the ocean. Saltwater can introduce unwanted salts and minerals into the wood, which may affect the final appearance of the driftwood.
4. Water Temperature:
You should also consider the water temperature. Warmer water often speeds up the soaking process, but avoid extremes, as overly hot water can damage the wood fibers.
5. The Soaking Container:
Choose an appropriate container for soaking your driftwood. A plastic tub or a large bucket works well. Make sure it’s large enough to accommodate your driftwood piece comfortably. You’ll need to submerge the wood fully, so consider the container’s size carefully.
6. Duration of Soaking:
The soaking time can vary depending on the factors mentioned above. On average, softwood driftwood may need a few days to a week of soaking, while hardwood may require several weeks or even months. Regularly change the water during the soaking process to remove the impurities that would leach out of the wood.
7. Cleaning and Brushing:
During the soaking period, take the time to clean your driftwood. You can use a stiff brush to remove dirt, debris, and any loose bark. This step not only helps with cleaning but also prepares the wood.
8. Drying and Curing:
Once your driftwood has soaked to your satisfaction, it’s time to dry it properly. Take it out of the water and place it in a well-ventilated area, preferably outdoors, to air dry. Depending on the size and type of wood, this can take anywhere from a few weeks to several months. Curing ensures that the wood is ready for your aquarium.
So there you have it. Remember that patience is key in this process. So, take your time, and you’ll end up with beautiful, workable driftwood that’s ready to be used for your fish tank and aquarium.

I’m Akin Bouchard. Even though I now own several different fish species, I first became a koi pond owner because I loved these creatures and wanted to turn my passion into something more serious. I take pride in my collection of koi fish and love sharing my knowledge with others interested in these beautiful creatures.
A Comprehensive Guide to Training Your Fish to Perform Amazing Tricks Feats

